Sunday, October 31, 2010

Tuscany trip

It's been a while since I haven't been posting anything new. The reason is that I was in Florence, following my man at his first ever conference and God it was amazing! I had a wonderful week of walking around the picturesque city with impressive churches, narrow romantic streets, beautiful buildings and smiley people. The morning would start with a breakfast at the hotel, then a lot of walking around and shopping, then lunch, short nap and then evening going out with all the nice people from the conference. And yes, computer nerds ARE interesting and noooot even close as nerdy as finance people! :P It was great!

One of the best parts of the trip was the food. I used to think that Italian food was about pizza and pasta but I was sooo wrong!!! Tuscany cooking is very diverse, including many amazing combinations of meat, vegetables, cheese, spices and much more. Recipes are coming soon!

Normally I eat my meat well done. However, a friend insisted on ordering a bloody one, and I have to admit that after trying the Florentina steak I will never be able to be a vegetarian!!!

Of course it is impossible to upload all the food-pictures in one blog post, so for now just the most representative ones. Just look! Those people surely know how to eat, and eat good!

The market speaks for itself. You can't walk around the Mercato Centrale without immediately getting hungry. I challenge you to take a quick look:


But then you go to a Trattoria for a lunch or dinner and you are forced to chose out of many appealing options. Impossible!

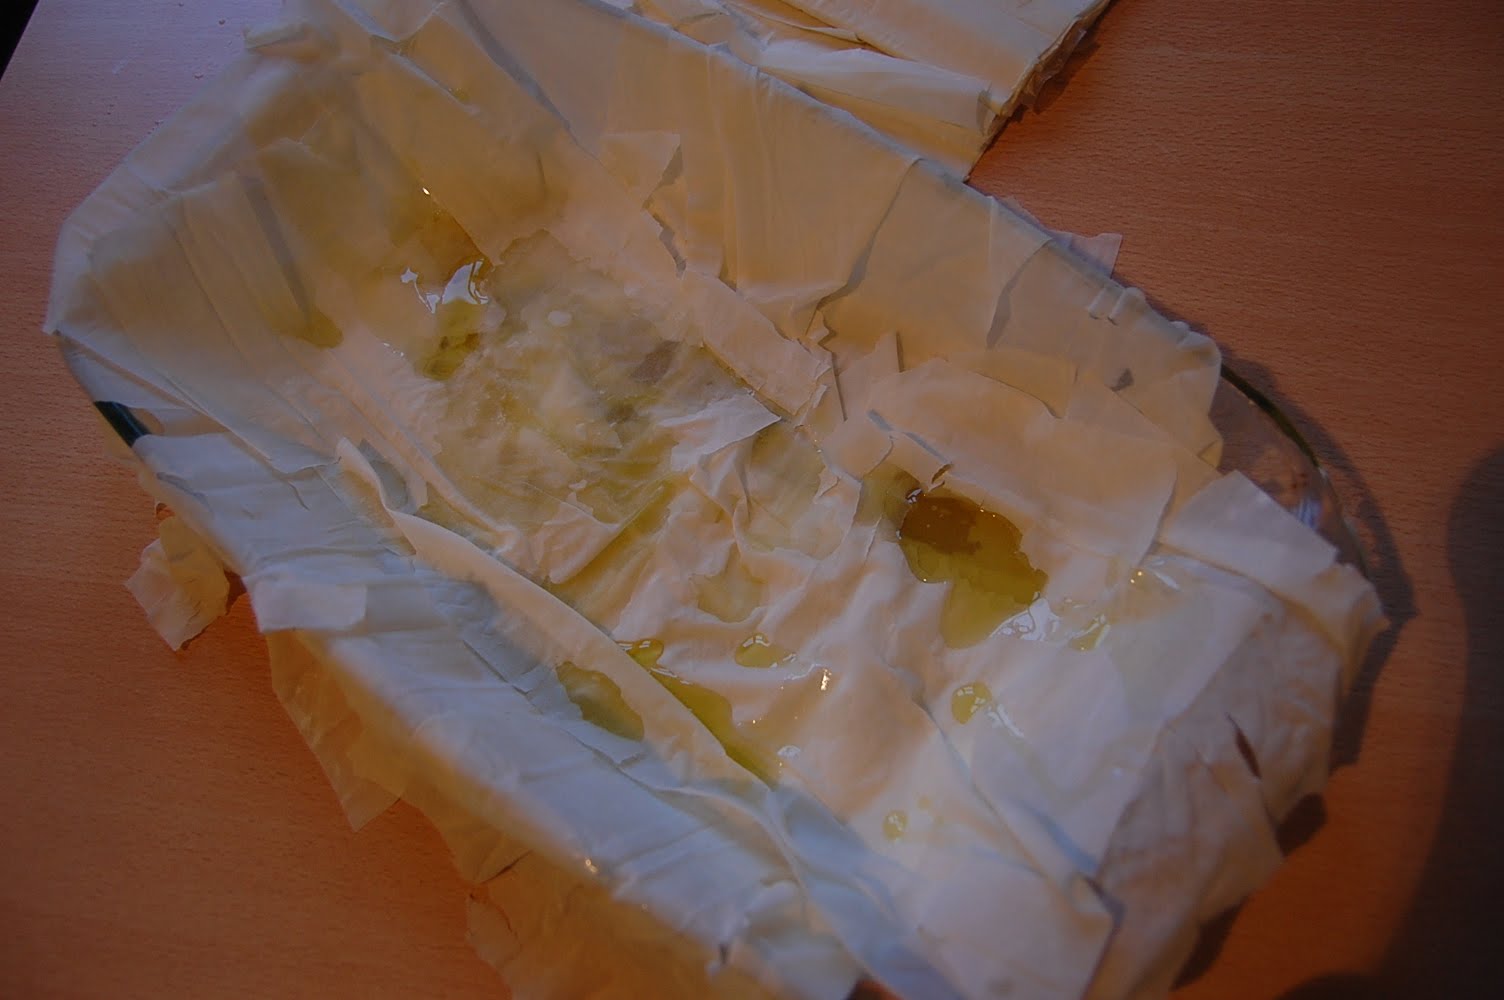
Antipasti (starters):
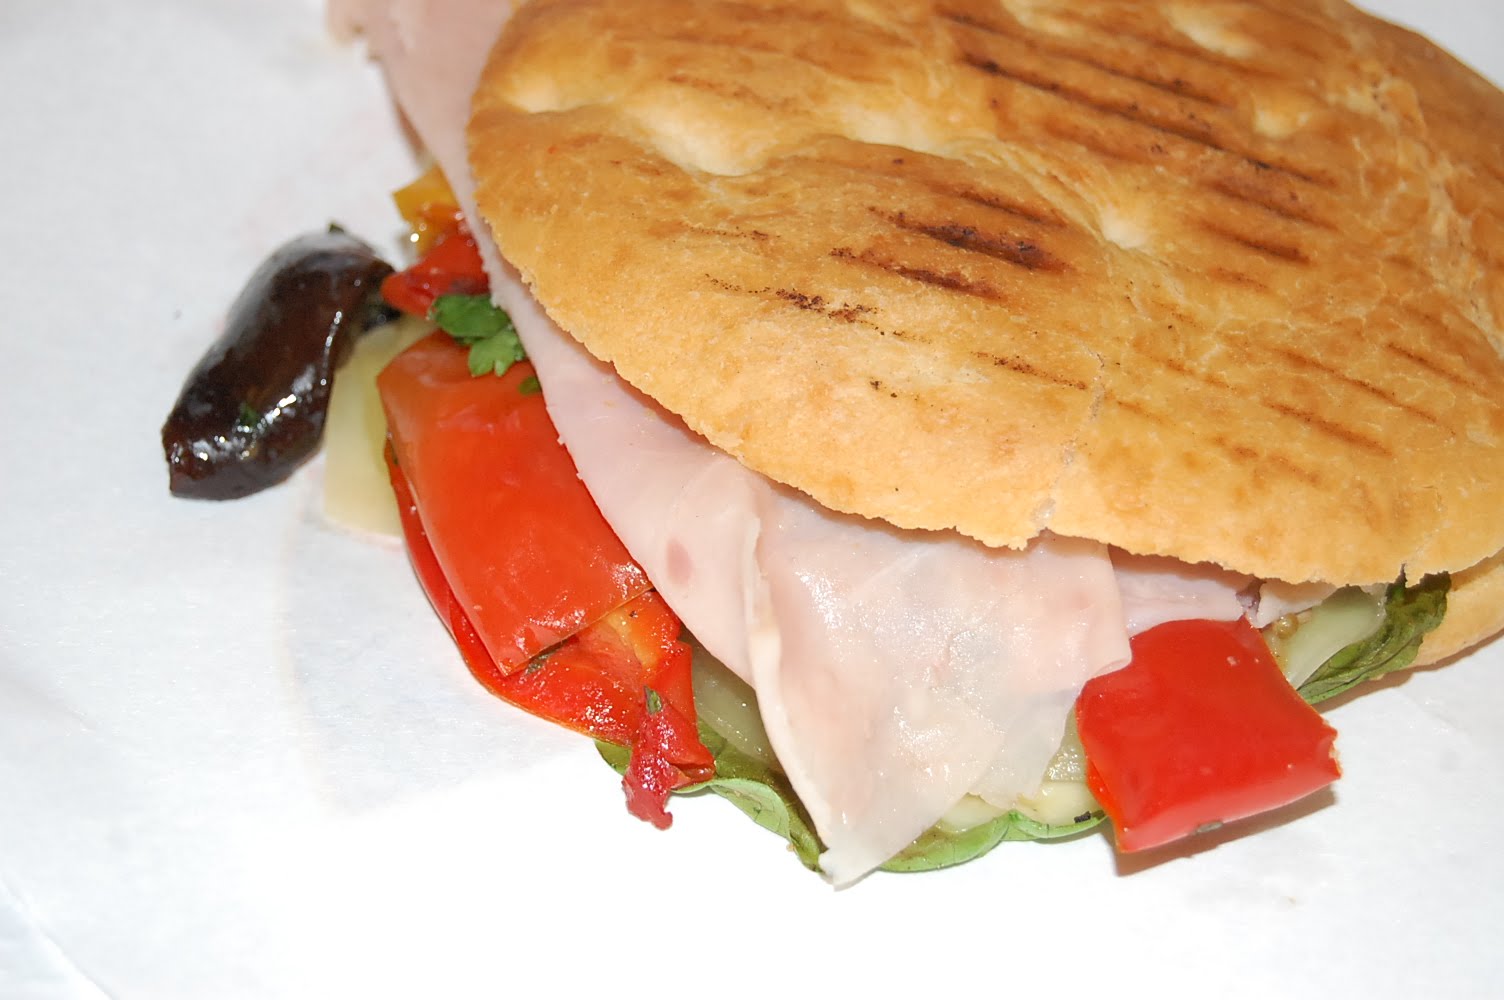


Panini:


Pasta:


Gnocchi:


And of course deserts!!! Typical italian such as panna cotta (with wild berries sauce in this case):


or local ones, like Vin Santo (sweet Tuscan wine) with Cantuccini (local crunchy almond cookies that you are supposed to dip into the wine):


I was surprised to know that in Italy it is very typical to drink coffee directly after dinner. Usually espresso or in my case just a cappuccino:


and more cappuccino:


And one of the best of all, Italian Gelato. I would have it every day between breakfast and lunch!


After this trip I am thoroughly avoiding being anywhere around the scales. I think I will have a week of diet before weighting myself :P It's gonna be really hard, given all the nice ingredients that I bought and the new cooking book that I can't wait to try!

Thursday, October 21, 2010

Cinnamon and Raisins Cake with Chocolate Sauce


I love having people coming over! Yesterday Carsten came over and brought a new board game which despite all the complicated rules was very good. Something about 45 minutes before he came I decided to make a nice cake. However, the one that I was initially aiming for required half a kilo of almonds, which I didn't have so I switched to my second best option: raisins and cinnamon. And since Stratis would kill me if I would not add at least SOME chocolate I also made a chocolate sauce which I later drizzled over the top of the cake.

We were playing (or at least trying to understand the rules) and without noticing we almost finished it all. At the beginning I was worried about the consequences of eating so much cake at 11 in the evening (I usually try not to eat after 7-8p.m.) But I think I will cite Carsten's saying: "This is an advantage of being an adult. You could eat anything you want, whenever you want it. You could even eat ice cream for breakfast!". Actually, earlier that day I ate ice cream for breakfast, and I was going to exploit my advantage as adult twice that day.

At the end, I actually used my advantage again today, when I ate the leftover cake for breakfast and it was goooood!!!

INGREDIENTS:

150 gr butter, softened
1 1/2 cup white sugar
2 eggs
2 cups water
1 cup black raising
5-10 cloves
2 tsp baking powder
2 tbsp white vinegar
1/2 tsp salt
1 tsp cinnamon
1 tsp nutmeg
2 1/2 cups flour

For the chocolate sauce:

2 1/2 cups water or milk (depending whether you want the sauce to be bitter or milky)
1 cup sugar (you may use half white and half brown sugar)
3/4 cup cocoa powder

1. In a small pan add the raisins, cloves and water and cook over a medium heat for about 15 minutes. Remove the cloves and drain the raising reserving 1 cup of the liquid.
2. In a large bowl beat the butter with a mixer until it is white, light and creamy.
3. Constantly beating, add the sugar to the butter.
4. Add the eggs and beat until the liquid is uniform.
5. Add the salt, cinnamon, nutmeg, juice from the raisins and flour. Mix well.
6. Add the baking powder and vinegar and as soon as you see bubbles try to mix the dough in a way that the bubbles stay inside. At the end the mixture should be thick but still "runny". Something like this:


7. Pour the mixture in a buttered cake form and bake in the over for about 40 minutes at 220°C. The cake is ready when you stick a match in it and the match comes back without any liquid dough on it. Remove and put on a serving plate.
8. Prepare the chocolate sauce. In a heavy non-stick pan put all the ingredients and cook stirring constantly until all the sugar dissolves and the sauce becomes thick.
9. Let the cake cool, drizzle it with the chocolate sauce and serve.

Wednesday, October 20, 2010

Eschovished Fish


I have to admit, I had no idea what does the word "eschovished" mean. I was looking for additional fish recipe to complete the Latin American dinner party menu and I found a recipe in a Carribean cooking book, liked how it looked and decided to try it. Later when I checked the meaning, I found that it actually refers to a particular way of marinading and cooking the fish, which is popular across the Caribbean islands, particularly in Jamaica.

I started preparing the recipe something about half an hour before the guests came so I adopted a "fast-version" of the recipe, which practically means that I skipped the marinading part. I also used a bit less vinegar than required, because honestly I was a bit afraid to use too much. But people liked it and so did I, which makes it... a success!

INGREDIENTS:

1 kg cod fillet
juice of half lemon
flour, for dusting
oil, for frying

For the sauce:

2 tbsp extra virgin olive oil
1 large onion sliced
1/2 red and 1/2 green pepper, sliced
3 cloves garlic, sliced
1/3 cup malt vinegar (I used white vinegar instead)
5 tbsp water
8-10 grains allspice
2 bay leafs
1 dry hot chilly pepper, whole
2 tbsp brown sugar
salt and ground black pepper to taste
parsley, chopped, for garnishing

1. If you decide to marinade the fish in advance, just sprinkle it with salt and pepper, place it in a shallow dish and pour over the lemon juice. Marinade for one hour. As I said, I skipped the marinading part.
2. Cut the fish in pieces and dust with some flower.
3. Heat some oil in a heavy frying pan and fry the fish until it is golden brown. Wile frying the pieces should not "overlap" so it may take a couple of rounds until all the fish is fried. Remove from the pan and set aside.
4. Make the sauce. In the same pan where you fried the fish add 5 tbsp of oil. Fry the onions until soft. Add pepper and garlic and cook for a couple of minutes more.
5. Pour in the vinegar, water and all the spices and sugar. Season with salt and pepper. Cook for 5 minutes.
6. Mix the fish with the sauce and serve garnished with some chopped parsley.

At this point some of the original recipes that I found online require leaving the fish to absorb the flavors for a couple of hours. Since I didn't have the luxury of time I skipped this step too. It was still very tasty but I think next time I will try to prepare it well in advance, follow all the steps and see what is the difference.

Tuesday, October 19, 2010

Green Beans with Broccoli and Eggs


After making the salad for a Sunday's dinner I had about half pack of frozen green beans left in my freezer. Given that my freezer is really tiny I was thinking of a recipe that would let me get rid of the leftovers.

Hmmm... Green beans, greens beans... My mom cooks green beans with eggs and it's actually a really nice side dish. She uses the ones that are sort of flat, I think they are called snap beans. Well, I only had string beans but I decided to give it a try. And since I also had some broccoli, I just threw it in as well. Not bad at all!

INGREDIENTS:

200 gr any green beans, cut in 3-4 cm long pieces
1 cup broccoli (tips only), cut in bites
1 cup leak, chopped
2 tbsp extra virgin olive oil
1 small onion, diced
2 cloves garlic, minced
1/2 cup water
3 eggs
4 tbsp lemon juice
salt and ground black pepper to taste

1. In a large pan heat the oil.
2. Add the onions and garlic and cook until the onion is tender.
3. Add the beans and water, cover and cook for about 5 minutes.
4. Add the broccoli and leak and cook for few minutes. Do not overcook it. The broccoli should be still crunchy.
5. In a small bowl beat the eggs with lemon juice, salt and pepper.
6. Pour the egg mixture over the vegetables and mix well, so that it goes everywhere. Cook for few minutes or until the eggs are hard and liquids have evaporated.

It could be served as a side dish with fish or stake, but I actually like it as a lunch just the way it is, without anything else. Light an healthy. Thanks mommy!

Sunday, October 17, 2010

Red Pepper and Green Bean Salad


Yesterday we had a little dinner party. It was nice to get together with people that I haven't seen for quite some time and I was really happy that I had the opportunity to cook for many people because this usually means that you could prepare many different dishes and all the food will be eaten and not thrown away!

Since I already had the Mexican Cod Caramba prepared, I decided to go with the Latin American cuisine. So, apart from the cod, I cooked Jamaican eschovished fish, Colombian cheesy potatoes, some home-made Guacamole and a Mexican pepper - green bean salad. I think the combination was pretty successful and the people seemed to enjoy it. :)

Here is the recipe of the salad. The rest of the recipes are coming the following days.

INGREDIENTS:

1/2 iceberg lettuce, shredded
200-250 gr cooked green beans
1/2 red and 1/2 sweet bell pepper, seeded and chopped
2 spring onions, chopped
3-4 drained pickles, chopped
1/4 cup whole green olives, seeded
2 tbsp canned sweet corn, drained
3 tbsp red wine vinegar
6 tbsp extra virgin olive oil
salt and ground black pepper to taste

1. In a b0wl combine the green beans, peppers, spring onions, pickles and olives.
2. Pour in the vinegar and olive oil and season with salt and pepper. Mix well.
3. In a large flat dish lay the lettuce. Arrange the vegetable mix on top, garnish with corn and it's ready to eat!

Saturday, October 16, 2010

Cod Caramba


One of my most favorite cuisines is Latin American, starting from Mexican and finishing with Brazilian, Colombian and Caribbean. Apart from being extremely tasty it is usually very healthy and colorful because of all the different vegetables used. So when I was thinking what to cook today, I automatically picked the Caribbean cuisine book from my book shelf. Whenever I decide to cook something from this book it is really hard to stop the decision on something. Everything looks amazingly delicious. So this time I just decided to open the book at some random page and cook whatever was there. I slightly changed the recipe, since I can't stand the real Mexican-spicy food (the original recipe requires some Tabasco sauce instead of chili flakes). But I would absolutely recommend this dish!

INGREDIENTS:

600 gr cod fillets (you could use half raw and half smoked fillet too)
1 cup fish stock or water
2 tbsp butter
1 onion, sliced
2 garlic cloves, crushed
1 green and 1 red pepper, seeded and diced
2 zucchinis, diced
150 gr canned sweet corn, drained
3 small tomatoes, diced
3-4 tbsp lemon juice
1/2 tbsp hot chili flakes
100 gr tortilla chips (better unsalted)
1/2 cup grated Cheddar cheese
slat, ground black pepper and cayenne pepper


1. In a baking tray lay the fish and the fish stock or water. Bake in the oven at 200°C until the fish is cooked and the flesh breaks easily. When ready separate the fish into large flakes and keep it hot. Leave the juices in the tray.
2. In a large pan melt the butter. Add onion, garlic and peppers and cook over low heat until the onions is soft and transparent. Stir in the zucchinis and cook for some more minutes.
3. Add corn, tomatoes, chili flakes, salt, black and cayenne pepper. Cook for few minutes, then add the mixture to the tray with fish. Mix well.
4. Crash the tortilla chips (not too small), mix with the cheese and sprinkle over the fish. Cook under the grill until the chips are crunchy and slightly brown.

If you have all the ingredients in your fridge (I had to visit the store) its really a matter of 30-40 minutes to prepare, so you could absolutely cook it during the week to make a really nice and different dinner.

Thursday, October 14, 2010

Home-made Rum and Raisins ice cream


Since I was little I remember myself trying to recreate an ice cream. It is one of the things that I always considered impossible. The first time, I saw at some old cartoon a robot-nanny mixing in a special device incorporated into her chest, milk, butter and sugar and turning all that into vanilla ice cream cones. I took that for granted and tried it myself! I mixed all those in a glass and put it in the freezer. The result was (obviously) disappointing! But please, give me a break! I was something like 5 or 6 :P

Through the years I tried freezing fruit juices, mashed water melon and even juice mixed with milk. Nothing ever worked! In best case scenario I would get frozen fruit cubes. So with the time I gave up on my dream to make my own ice cream. Of course that was before the Internet-era (omg, am I that old?!).

Once I was googling for summer desserts and I accidentally found a recipe for a Rum and Raisin ice cream. Given that this is one of my all time favorite flavors, of course I had to try it right away. And God it was amazing!!!

INGREDIENTS:

2 tbsp rum or rum essence (well if you use a bit more there is no harm!)
125 gr raisins (again if you are raisin - fan feel free to add a bit more)

75 gr sugar

125 ml water
3 egg yolks

1 tsp vanilla essence or 2tbsp vanilla sugar

450 ml double cream (it is important that you use a thick heavy cream (at least 30% fat), otherwise the ice cream won't be creamy enough)

1.
In a small bowl mix the raisins with rum or rum essence and set aside ti marinade.
2. In a heavy sauce pan add water and sugar and and stir over a low heat until the sugar has dissolved. Increase the heat and boil for few minutes.
3. In a bowl whip the egg yolks with vanilla essence or vanilla sugar until creamy. Keep beating the mixture and pour the hot syrup.
4. Let the mixture cool for some minutes and then add the raising with all the liquid.
5. In a separate bowl whip the cream until just stiff (you could use a mixer but don't beat too much, otherwise you'll get butter) and then add it to the eggs and raisins mixture.
6. Pour the mixture in a shallow container and place in the freezer. After about 1 hour, or when the ice cream is partially frozen return the ice cream to a bowl and beat well. Return to the container and freeze for 1 more hour. Repeat this step one more time and it's ready to eat.


This ice cream is sooo easy to prepare (well maybe just a bit messy) and it is sooo good that it's impossible to maintain it in your freezer and not to eat it for breakfast, lunch and dinner. With all the consequences of course. Again, don't try to count the calories, I think it's better when you don't know!

PS: The picture is not really mine, because it's been some time since I haven't made this ice cream. I borrowed the picture from Comemberu blog, which uses sort of similar recipe for this ice cream.

Chow Mein


I always wanted to get myself a good wok. And each time in the store I would find excuses, that the ones offered were either too expensive or of a poor quality or a combination of both. That's why I was really happy when for my birthday Katja and David got me a wok! (Thank you guys!) Of course the very next day I had to try it. It proved to be a very good one.

In order to decide what to cook I checked one of many cooking books that I have (in fact I have a whole collection of them!) and I found the following recipe, which I adjusted according to my taste and the ingredients in my fridge. This is what I got:

INGREDIENTS:

500 gr egg noodles, cooked according to the package directions
3 tbsp vegetable oil

2 cloves garlic, chopped
2 tsp fresh ginger, chopped

1 red chilly, chopped
1 skinless, boneless chicken breast, thinly sliced

20-25 uncooked large shrimps or tiger prawns, peeled
100 gr green beans

1 medium-size carrot, chopped

100 gr baby corn, chopped
1/2 cup mushrooms, chopped
2 tbsp bamboo shoots, sliced
3 tbsp soy sauce
3 tbsp oyster sauce
black pepper, freshly ground

1.
Heat 2 tbsp of oil in a wok.
2. Add garlic, ginger and chillies and fry for 1-2 minutes over a high heat.
3. Add chicken, shrimps and beans. Stir-fry until the chicken and shrimps are cooked through. Transfer to a bowl.

4. Heat the rest of the oil in the same wok. Add green beans, carrots, baby corn, mushrooms and bamboo shoots
. Stir-fry for few minutes.
5. Add the noodles and toss to mix. Season with soy sauce, oyster sauce and black pepper.
6. Add the chicken - shrimp mixture. Reheat and mix well with the noodles.

I actually changed the original recipe, which required 2 lap cheong (air-dried Chinese sausage) and a bit different mix of vigetables (green beans, beansprouts, garlic chives). I also added more soy and oyster sauce, I think the original amount was not enough and the food was a bit dry. Finally, it was really good and if you eat reasonable amount (pretty hard for me!) it's not heavy at all!


Bon appétit!


PS: The recipe was adopted from the book "Around the World in 450 Recipes".


Tuesday, October 12, 2010

Omelet with ham, cheese and chili beans


About a year ago I brought to Amsterdam a Greek Tavli game (one of the most popular versions of Tavli is backgammon). Since then me and Stratis established our little weekend tradition. The morning starts with a big cup of Greek coffee (recipe is coming soon and don't you dare calling it Turkish!) and a game of Tavli which could last up to 2 hours (!) and even more sometimes depending on the mood.

Anyways, the problem with this tradition was that we actually stopped eating proper breakfast and would eat a brunch (=BReakfast + lUNCH) instead. So I figured that in order to keep us full till the evening, the brunch should be quite nutritious. Piece of cake! What is more nutritious than eggs?! And since we are not so huge fans of plain eggs I came up with the following simple, tasty and quite healthy omelet recipe. I use 2 eggs per portion. I think in combination with all the other ingredients it's more than enough.

INGREDIENTS:

2 eggs
2-3 slices Gouda cheese, chopped (you could substitute it with any other low fat cheese, like mozzarella or Feta)

1 tbsp fresh basil, chopped
1 tbsp fresh parsley, chopped

1 tsp lemon juice

1 small pinch baking soda salt and pepper to taste
1 tsp extra virgin olive oil

1/2 small onion, chopped

1/2 red paprika

2-3 slices smoked ham, chopped (optional but very highly recommended)
1/2 can (100gr) chili beans in their sauce

1. Break the eggs in a bowl and beat them with a whisk.

2. Add the cheese, basil, parsley, lemon juice, baking soda, salt and pepper and mix well.

3. In a large pan heat the oil.

4. Add the onion, paprika and ham to the pan and fry until the onion is golden.

5. Stir in the egg mixture, lower the fire, cover with a lid and let cook until the omelet is solid. Transfer to a plate.
6. In the same pan warm the chili beans and transfer them to the plate with the omelet.

Ready and full with proteins!

Thursday, October 7, 2010

Paraskevopita - Chicken FridayPie


Few years ago (many years ago?) both me and Stratis were still living in Thessaloniki. He was renting an apartment together with his brother and I was sort of constant visitor :P There were some days we were so bored to go shopping for food that our fridge would only have some old milk and beer and we would order pizza from what is probably the cheapest pizzeria ever (back then 60eurocents/slice :P). But if the mood was proper we would literally stuff the fridge with all kinds of nice things and then wonder what recipe could mix all of them together. Well one of those days I came up with this nice and super easy pie. The idea was to mix together some ingredients and then use a pack of frozen pastry to stuff it with the filling.

Yesterday I managed to hurt my back so today I spent most of the day on the couch. As the evening was approaching and Stratis would come back from the office I started thinking of a quick recipe that would feed my man and allow me to spend as little time as possible standing in front of the stove. And somehow I remembered Paraskevopita. To be honest I haven't cooked it ever since that first time and was struggling to remember if I used any spinach in the "original" version. But since I didn't have any spinach anyway, I decided to skip it. Also the original recipe didn't have raisins in it. But the rest of the ingredients are same :)

INGREDIENTS:

For the filling:
400gr skinless, boneless chicken breast, sliced in small pieces as for wok

1 tbsp extra virgin olive oil
1 large onion, chopped
2 cloves garlic, chopped
2 cups cooked rice (I used brown rice but any other would do)

1/2 cup black raisins
5-6 large champignons, chopped

1 cup chicken stock

1 tbsp dry oregano

1 tsp sweet boukovo
1/2 tsp ground cumin
1 pinch ground cinnamon
1/2 tsp ground ginger
4-5 slices smoked ham, cut in small pieces

1 cup grated Gouda cheese
1 egg, beaten

salt and pepper to taste

Rest of the ingredients:
1/2 pack fillo (phyllo?) or 2 sheets sfoliata (sfogliata?) or any other pastry you like

2-3 tbsp extra olive oil for brushing

1. In a large pan heat the oil.

2. Add chicken, onions and garlic and cook until the chicken is golden
.
3. Add rice, rasins, mushrooms, oregano, boukovo, cumin, cinnamon, ginger and chicken stock, cover and cook for about 5 minutes at low heat.
4. Add ham and Gouda cheese.

5. Turn off the fire, add salt, pepper and a beaten egg and mix everything with a wooden spoon until uniform. Set aside to cool.
6. Brush a medium-size, deep baking tray with olive oil and place one phyllo sheet on the bottom. Drizzle randomly with some oil. Use very little oil since you will add more to each sheet. Add another sheet and again drizzle with oil. Repeat until you get about 5-6 layers (if you are using single sheet of pastry, i.e. sfoliata, you dont have to add oil at all). Don't try to straighten the pastry. It should be a little wrinkled to keep the oil. At the end it should look like this:


7. Fill with the chicken filling and spread out evenly so that the filling goes everywhere.


8. Place 2-3 sheets of phyllo on top, brushing with some oil between the layers. Close the remaining pastry and drizzle with oil again.


9. Bake in a preheated oven at 180
°C for about 30 minutes or until the pastry is dark golden.
10. Let it cool a little before serving and enjoy!


Back in the days
we've been thinking how to name the pie. The initial idea was to call it Katerina'sPie, but we figured it was a lame name. So we came up with Paraskevopita (in Greek Paraskevi = Friday and pita = pie) since I cooked it on Friday evening. The name stayed ever since!

Tuesday, October 5, 2010

Chicken with thyme, Feta cheese and Ouzo sauce


Today was my first ever job interview. Even though it turned out to be pretty good (well the more I think about it the less cool it seems but anyways) I still came home pretty stressed and worn out. So after spending one hour on the couch I decided to kick myself to the kitchen and cook something different. I have to admit that I was not really planning anything specific, just followed my instinct and the result turned out to be pretty nice, so I thought it was worth sharing :)

INGREDIENTS:

500gr chicken breast, skinless and boneless, cut in bites
4 tbsp butter or margarine

1 tbsp pine nuts

1-2 tsp dry thyme
10 - 12
bahari grains
1/2 tsp coriander seeds
1 clove garlic
, chopped
100gr Feta cheese (You could substitute it with any other feta-like cheese, as long as it is salty enough and not too fat)
1/2 cup Ouzo (traditional Greek anise-flavored aperitif)

1 tbsp lemon juice
salt and ground black pepper to taste


1. In a heavy sauce roast the pine nuts.
2. Add the butter, coriander seeds, bahari grains and dry thyme and simmer for a couple of minutes until the butter has melted completely.

3. Add garlic and chicken and cook on strong heat until the chicken gets a golden crust. Lower the fire and cook till the chicken is cooked through.

4. Mash the Feta cheese and add it to the pan. Stir with a spoon until the butter and Feta mix together in a thick paste.

5. Pour in the Ouzo and lemon juice, season with some salt and pepper (remember feta is very salty so don't add too much salt), turn off the fire, cover and let the chicken absorb the flavor for some minutes before serving. If the sauce turns to be too thick you could add some more Ouzo or just a little bit of water.


I served it with plain and spinach fettuccini, but I would guess that it should be good with any other pasta or rice. Funny thing is that I actually hate Ouzo and I was going for the white wine, which I didn't have. But finally Ouzo, Feta and thyme made a very nice combination. I guess I'll have to bring more Ouzo next time I go home! ;)

Monday, October 4, 2010

Lasagna


It's been a while since I started planning my cooking blog. As soon as the idea came I started taking pictures of most of my creations. So, as I was thinking what my new post would be I went through the pictures and remembered a great lasagna recipe that I made few weeks ago. I borrowed the original recipe from My Lasagna Recipe and adjusted it a bit since I couldn't find some of the basic ingredients here. I think the result was pretty good. By the way, I think this lasagna tastes even better the second day!

INGREDIENTS:

For the meat sauce:

700gr minced beef
2 medium onions, chopped
4 cloves of garlic
2 tbsp extra virgin olive oil
2 cans (800gr) diced tomatoes
4 tbsp tomato paste
150 ml dry red wine
2 tbsp sugar
1/4 cup fresh basil, chopped
1/4 cup fresh parsley, chopped
2 tbsp dry oregano
1tsp dry thyme
8-10 bahari grains (allspice)
1 tsp hot boukovo (crashed chilly peppers)
1/2 tsp coriander seeds
salt and pepper to taste

For the cheese filling:

400gr Philadelphia or Philadelphia-like cheese. You could use either plain cheese or the one spiced with herbs. I like the garlic and dill flavor the most.

1 egg
1 tbsp grated nutmeg
2 tbsp parsley, chopped

1 tsp dry oregano
1 tsp dry thyme


Rest of the ingredients:

12 lasagna sheets

1 1/2 cups grated mozzarella

1 1/2 cups Parmesan cheese

1. In a large sauce pan heat the oil. Add onion, garlic, bahari grains, boukovo and coriander seeds and cook until onions are tender.
2. Add the minced meat and cook on a low heat until the meat is brown.

3. Stir in the tomatoes, tomato paste, wine, sugar and the remaining spices, cover and cook on a low heat for about 30 minutes

4. Meanwhile soak the lasagna sheets for about 15 minutes in hot water. Remove from the water and place on a clean kitchen towel.
5. Prepare the cheese filling by simply mixing all the ingredients together until the paste is uniform.
6. In an ovenproof pan, large enough to fit 4 of the lasagna sheets, pour some meat souce, just enough to cover the bottom.
7. Place the first layer of lasagna sheets over the sauce, in a way that they overlap a little.

8. Spread half of the cheese filling over the lasagna and sprinkle with 1/2 cup of mozzarella and 1/2 cup of Parmesan cheese.

9. Spread about 1/3 of the meat sauce over the cheese filling.

10. Repeat the steps 7-9.

11. Cover with the remaining lasagna sheets and pour over them the remaining meat sauce.

12. Sprinkle with the remaining mozzarella and Parmesan, cover with foil, place in a preheated oven and bake at 200°C for about 30 minutes. At the end remove the foil, turn on the grill and bake just enough to make a nice crust on top.

13. Before serving let it cool for some time. Otherwise it will fall apart while you transfer it to a plate (trust me!)


This recipe is a bit time consuming but it is soooo worth it!

Sunday, October 3, 2010

Greek herbs & spices

Before continuing with recipes I thought it would be a good idea to describe the spices that I constantly use and always have in my kitchen. These are typical Greek spices, some of them very popular and others less known abroad. I will try to translate the names and explain how they look and where to use them, to spice up your food.

Dry oregano and basil: Basic spices used in almost all Greek meat and fish dishes, salads as well as all tomato-based sauces. It doesn't matter if the oregano is actually Greek or from other countries as long as it was growing in the mountains. The best oregano grows at sunny spots, where the soil is dry and infertile and only the flowers should be dried and used, as those contain high percentage of oils that make the food smell like summer on a plate. On the other hand, basil could be used both dry and fresh. Lately I have a pot of basil growing in my kitchen so I could have it fresh any time.

Dry thyme: gives amazing smell, especially when used in a sauce together with white wine. Similar to oregano and basil could be used in a large variety of dishes from salads to all kind of meat. Also matches perfectly with cheeses, particularly creamy ones.

Boukovo: crashed dried red chilly peppers. You could find it in two versions: hot or sweet (less spicy than the hot one). Commonly, used to marinade red meat or give spicy flavor to sauces. Otherwise, could be used in a same way as cayenne pepper.

Kimino = cumin, either seeds or ground. Originally from India, now used almost in all spicy cousines, like for example Mexican. In Greece, it is mostly used to spice up minced meet dishes, such as meatballs, burgers, soutzoukakia etc. Sometimes could be added to breads.

Bahari = either Jamaican pepper or Guinea grains or allspice. Looks just like black pepper grains, just a bit bigger and smells slightly different. Typically bahari is added to stews (stifado) and tomato-based sauces. In Amsterdam I usually buy it in Turkish stores although I have the feeling that it is slightly different from the one I bring from Greece.

Kanella - cinnamon, either stick or ground and Garifalo = clove, either whole or ground. These are the spices that you either love or hate. Mostly used in traditional deserts. You could use the cinnamon sticks and whole clove to flavor the syrup for baklava or other similar sweets. On the other hand ground cinnamon could also be used for spicing red meat, chicken or tomato-based sauces. This is very common in Konstantinoupoli (today Istanbul) cousine. Just make sure you don't use too much of it, otherwise you risk making your food bitter. By the way, there is a great Greek movie that I highly recommend to everybody. The movie is called "Politiki Kouzina" (Touch of spice) and it presents recent Greek history as well as Greek food-philosophy.

I think I covered the most important ones. Of course there are many many more, but these are the most typical and widely used.

Black Forest Cake


I've always loved chocolate. And if I have to choose between chocolate and more chocolate... Well I think the outcome is pretty obvious!

Few days ago, me and some friends had 2 reasons to party: our graduation and my birthday. Of course the first one requires a lot of alcohol. On the other hand, I was actually planning to get a cake. However, "someone" figured out that if we eat anything between the drinks it would irreversibly disturb our path towards a bad hangover next morning. So... no cake!

Next day, and after having a huge cup of coffee, I decided that even if my birthday was already over it was still nice to have a delicious birthday cake, my all time favorite Black Forest. And since in Amsterdam finding a good Black Forest is probably much harder than doing a Master's degree I headed towards the supermarket for ingredients. I have to warn you that this cake is pure evil and is not appropriate for people who diet. I think it would be better for my feeling of guilt not to attempt to count the calories! The recipe seems insanely long but in fact it's really easy to make and takes no more than 1.5 hour.

INGREDIENTS:

For the dough:

5 eggs
150gr sugar
125gr flour
40gr cocoa powder
1/2 tsp baking powder
2 tbsp white vinegar

For the syrup:

150gr white sugar (you could also use brown sugar to make the syrup taste more intense)
100ml water
3 tbsp black rum or rum essence (you could of course use any other flavoring syrup but personally I find this combination the best)

For the filling:

800ml double cream
80gr caster sugar
350gr canned cherries, pitted
100gr cherry jam (you could as well use strawberry jam, just make sure it's thick enough)
Some choco flakes for decoration

1. Beat the eggs and the sugar with a mixer until the sugar dissolves completely and the mixture is white and puffy.
2. Add flour, cocoa powder, baking powder and vinegar and mix with a spoon until until the dough is smooth. The mix of baking powder and vinegar produces a chemical reaction, creating bubbles that will make the dough soft and spongy. While mixing try to capture the air inside the dough.
3. Cover a deep round baking tray (diameter 20-25cm) with foil and transfer all the mixture inside
4. Bake in a warmed up over at 220°C for about 40 minutes or until the cake is cooked through. To see if it is ready stick a match inside it. If it comes up clean, with no raw dough on it, the cake is baked. Set aside to cool.
5. In a small sauce pan mix water and sugar and cook it until the sugar dissolves and the mixture is boiling intensively. Let it cool and then add the rum. The syrup is ready.
6. With a mixer beat the cream with the caster sugar until it forms a whipped cream. Be careful not to overdo it, otherwise you risk turning your cream into sweet butter. Alternatively, you could use 800ml of already prepared whipped cream.
7. Once the cake is cold, slice it with a sharp knife into 3 "disks" of same thickness. Place the first disk on a plate and pour a generous amount of syrup over it. The cake should be soaked.
8. Spread half of the jam on the surface and cover with 1/3 of the whipped cream.
9. Place half of the cherries randomly over the cream and cover with the next "cake disk". Repeat steps 7-9 once again. Save some cherries for the decoration.
10. Soak the last cake disk in syrup and place it on top.
11. Spread the remaining cream all over the cake and sprinkle with choco flakes. Place some cherries on top and Voilà.

Saturday, October 2, 2010

Getting started

As most of the Greek people I love good food and what is more I love cooking for friends and family. Loved it ever since I, secretly from my mom, baked my first apple pie. As I usually say, cooking is the only creative thing that I do. Some people paint, others write songs or make their own jewelery. Well, I cook! The whole idea of transforming the raw materials into delicious creations is rather exciting and the mixes of colors and smells only improve the experience! :)

The idea of my own cooking blog has been around for quite some time now. But as always, there are other, more important things to do (studying, studying, studying with some Belgian beer in between :P) However, after the graduation all those important things disappeared (well apart from the beer of course!) leaving plenty of free time and a bunch of nice recipes that I'd like to share with friends. So, after spending a week on finding the name of the blog (Obrigada, Arturinho!) I think it's time to get started!